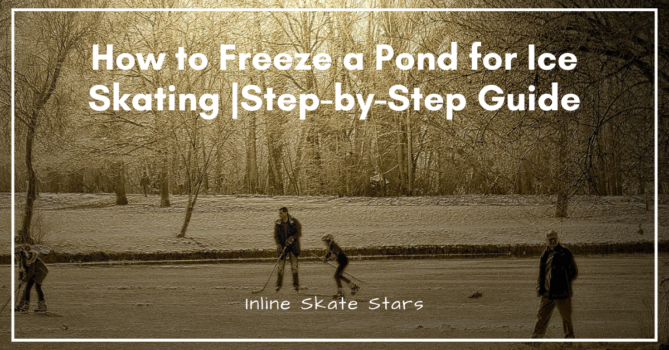
How to freeze a pond for ice skating is an exciting activity. However, it can also be a hurdle when you don’t know how to go about it. Ice skating during winter is fun and exciting because you don’t have to go to an indoor rink anymore.
So, if you have a pond on your property, the best thing to do is freeze it for ice skating with your friends and family. When properly frozen, you can play hockey or do recreational skating for fun. If you’re wondering how to freeze a pond for ice skating, here’s the quick rundown.
- Define and Mark out the Skating Area
- Clear out Debris, Twigs, Leaves, Weeds, and Plastic Materials
- Clear out Snow from the marked out Skating Area
- Dig a Hole through the Ice to get Some Water
- Fill the Marked out Skating Area with Water
- Allow the Surface Water to Freeze
- Sprinkle more Water to Freeze the Pond to Your Satisfaction
How to Freeze a Pond for Ice Skating
But, this is only the scratch on the surface. In the rest of this guide, I walk you through step by step procedure for how to prepare a pond for ice skating. So, let’s get to it!
1. Define and Mark out the Skating Area
Your skating area will depend on the size of the pond. For example, a small pond can only hold a small ice skating rink, while a large pond can hold a bigger pond rink. So, define and mark the skating area based on your preferred rink size and the pond size.
However, it’s best to mark out standard sizes like 50 by 100 feet, 100 by 100 feet, or more. This should also be determined by the number of skaters you expect to have on the pond. So, if you’re hoping to have many people over, including friends and family, you want to make sure you have marked out an appropriate skating area.
2. Clear out Debris, Twigs, Leaves, Weeds, and Plastic Materials
Next, you should clear out debris, twigs, leaves, weeds, and plastic materials (if any) from the skating area you’ve marked out. This is important because it’s more fun to skate on a smooth surface than a rough one. Unfortunately, this debris and twigs leave bumps on ice and can hinder smooth skating.
What is the best way to clear them out of the skating area? You could be asking. You need two tools to carry out his exercise—a weed cutter and a rake. Start by cutting out any weeds growing inside and around the pond. Then, use the rake to pull the weeds, twigs, and other materials floating on water.
Remember, you should first clear out all debris, twigs, leaves, and weeds when the temperatures start to fall before the pond begins to freeze. That way, you’ll have an easy time clearing out everything you don’t want to have in the pond.
3. Clear out Snow from the marked out Skating Area
Next, you should clear out the snow from the marked-out skating area. So, grab a flat nose shovel and push the snow from the middle of the pond out. You also want to clear out snow on the sides of the pond. Only stop when the snow is entirely out of the way.
Clearing the snow out of the way helps prepare the marked skating area by exposing the frozen pond ice. The best part is that you can use the snow to create sitting areas around the pond. Not everyone will be skating at any given time. So, they can use the snow-made sitting areas to rest.
4. Dig a Hole through the Ice to get Some Water
At this point, you’re almost done freezing the pond for ice skating. However, you need to pour some water on the exposed frozen pond water to complete the task. The good news is that you don’t have to stress about where and how to get the water because you have plenty underneath.
All you have to do is access it by carving a hole through the hard ice using a hatchet. However, if you don’t have one, you can also use a pickaxe. It’s essential to create a wide enough hole regardless of the tool you’re using. The right-sized hole should be large enough to allow a garden horse.
But, if you don’t have a garden hose, you can still use a bucket to draw in water from the pond. Remember to mark out this hole for future reference. There are many ways to do it, like covering it up with a used car tire and placing a circular board to cover the tire opening.
You can also use a water pump to make your work easy, especially with a significantly big-sized skating area. You want to save as much time as possible, and using a water pump and a garden hose is a sure-fire way to do that.
5. Fill the Marked out Skating Area with Water
Connect the suction hose and the discharge hose to the water pump. Then dip the suction hose into the pond through the hole you carved earlier. When ready, turn the pump on to get water onto the pond surface to glass it.
However, you want to be careful not to overdraw the water because it can cause the ice to break in. Therefore, ensure you have a generous amount of water covering the pond. Also, have a long discharge hose depending on the size of the skating area.
You can also have someone help you out with the discharge hose because if it kinks, it can cause the pump to blow off.
6. Allow the Surface Water to Freeze
Next, ensure the pond surface is filled with water. Then, allow the water to freeze overnight. As a rule of thumb, you should glass the pond when the temperatures are significantly low at 10°C or below that. This serves to help freeze the pond quickly.
7. Sprinkle more Water to Freeze the Pond to Your Satisfaction
The next day you should sprinkle more water to freeze the pond to your satisfaction. Repeat this as many times as you want if the pond isn’t glassed according to your standard. You should have the pond ready for ice skating in 1-3 days on the higher side.
Risks Associated with Ice Skating on Frozen Ponds + (How to avoid them)
Skating on a frozen pond can be risky, especially when you don’t take caution when freezing the pond or when ice skating. But does this mean you stop skating on frozen ponds? Nothing can be further from the truth. And it would beat the logic of freezing the pond for ice skating in the first place.
That being said, below are the risks associated with ice skating on frozen ponds and how to avoid them. Let’s get going!
Ice Skating in Thin Ice
Ice skating on thin ice can be dangerous. That’s why you want to flood the rink with water many times to glass the pond to the right thickness. What is thin ice? You’re probably asking. The right ice thickness for ice skating should be at least 8 inches. Thin ice, therefore, is an ice surface that’s below 8 inches.
Thin ice can easily cave in, especially when many people use the frozen pond for ice skating. To be safe, it’s best to only skate on the pond when you’ve confirmed the thickness is at least 8 inches. If you’re wondering how to go about it, you’ll need a measuring tape to measure the ice thickness.
Remember the hole you carved to draw water from the pond? This is the one you should use to confirm the ice thickness. If you want, you can carve another one on the far end to compare the thickness. To be safe, only proceed with skating when you’re verified the pond is thick enough.
Skating on Bumpy Ice
Bumpy ice is associated with twigs, debris, leaves, especially when they’re not cleared out of the way during the ice formation process. The problem is that they can hinder smooth-skating, leading to many fall accidents. So always make sure these objects are entirely out of the way when freezing the pond for ice skating.
Ice Skating on Cracked Ice
Skating on cracked ice can be risky because you have no idea when the ice will break-in. Therefore, it’s advisable to keep off the cracked ice until it’s no longer a threat. A good rule of thumb is to glass the pond again when you notice there’s a crack.
Skating on Opaque White or Grey Ice
According to the Canada Red Cross, skating on opaque white or grey ice can be dangerous because these colors usually mean the ice isn’t formed correctly. The right ice to skate on is clear blue because it’s strongest. That’s why you want to aim for when glassing the pond.
Not Wearing the Recommended Gear for Ice Skating
You always want to wear the right gear when ice skating to protect yourself from cold or fall injuries. The right gear for ice skating includes helmets, gloves, beanies, long polyester pants, socks, a jacket, and a sweater. You can also wear knee pads to prevent knee injuries.
How to Freeze a Pond for Ice Skating | Wrapping Up
How to freeze a pond for ice skating can be daunting for some people when it shouldn’t. That’s why I’ve put together this guide to help you freeze your pond for skating this winter season. Below is the quick rundown:
- Define and Mark out the Skating Area
- Clear out Debris, Twigs, Leaves, Weeds, and Plastic Materials
- Clear out Snow from the marked out Skating Area
- Dig a Hole through the Ice to get Some Water
- Fill the Marked out Skating Area with Water
- Allow the Surface Water to Freeze
- Sprinkle more Water to Freeze the Pond to Your Satisfaction
Lastly, remember to stay safe when skating on a frozen pond. Nothing should go wrong if you stick to the guidelines in this blog post. I hope you found this guide helpful. Happy skating.
More Reading
Is Ice Skating a Good Workout? Revealed
Does Roller Skating Help with Ice Skating? {7 Unique Ways}
Is Ice Skating Like Roller Skating? | {the Ultimate Comparison}